RIVET SSO: Okta
Utilize SSO Functionality with RIVET
Identity Provider (IdP) Setup
These are instructions for setting up Rivet SAML SSO with Okta. While setting up your SSO connection it would be best to keep your Okta portal tab and Rivet Security tab open for easy navigation back and forth.
Step 1: Create a new Okta application for RIVET
-
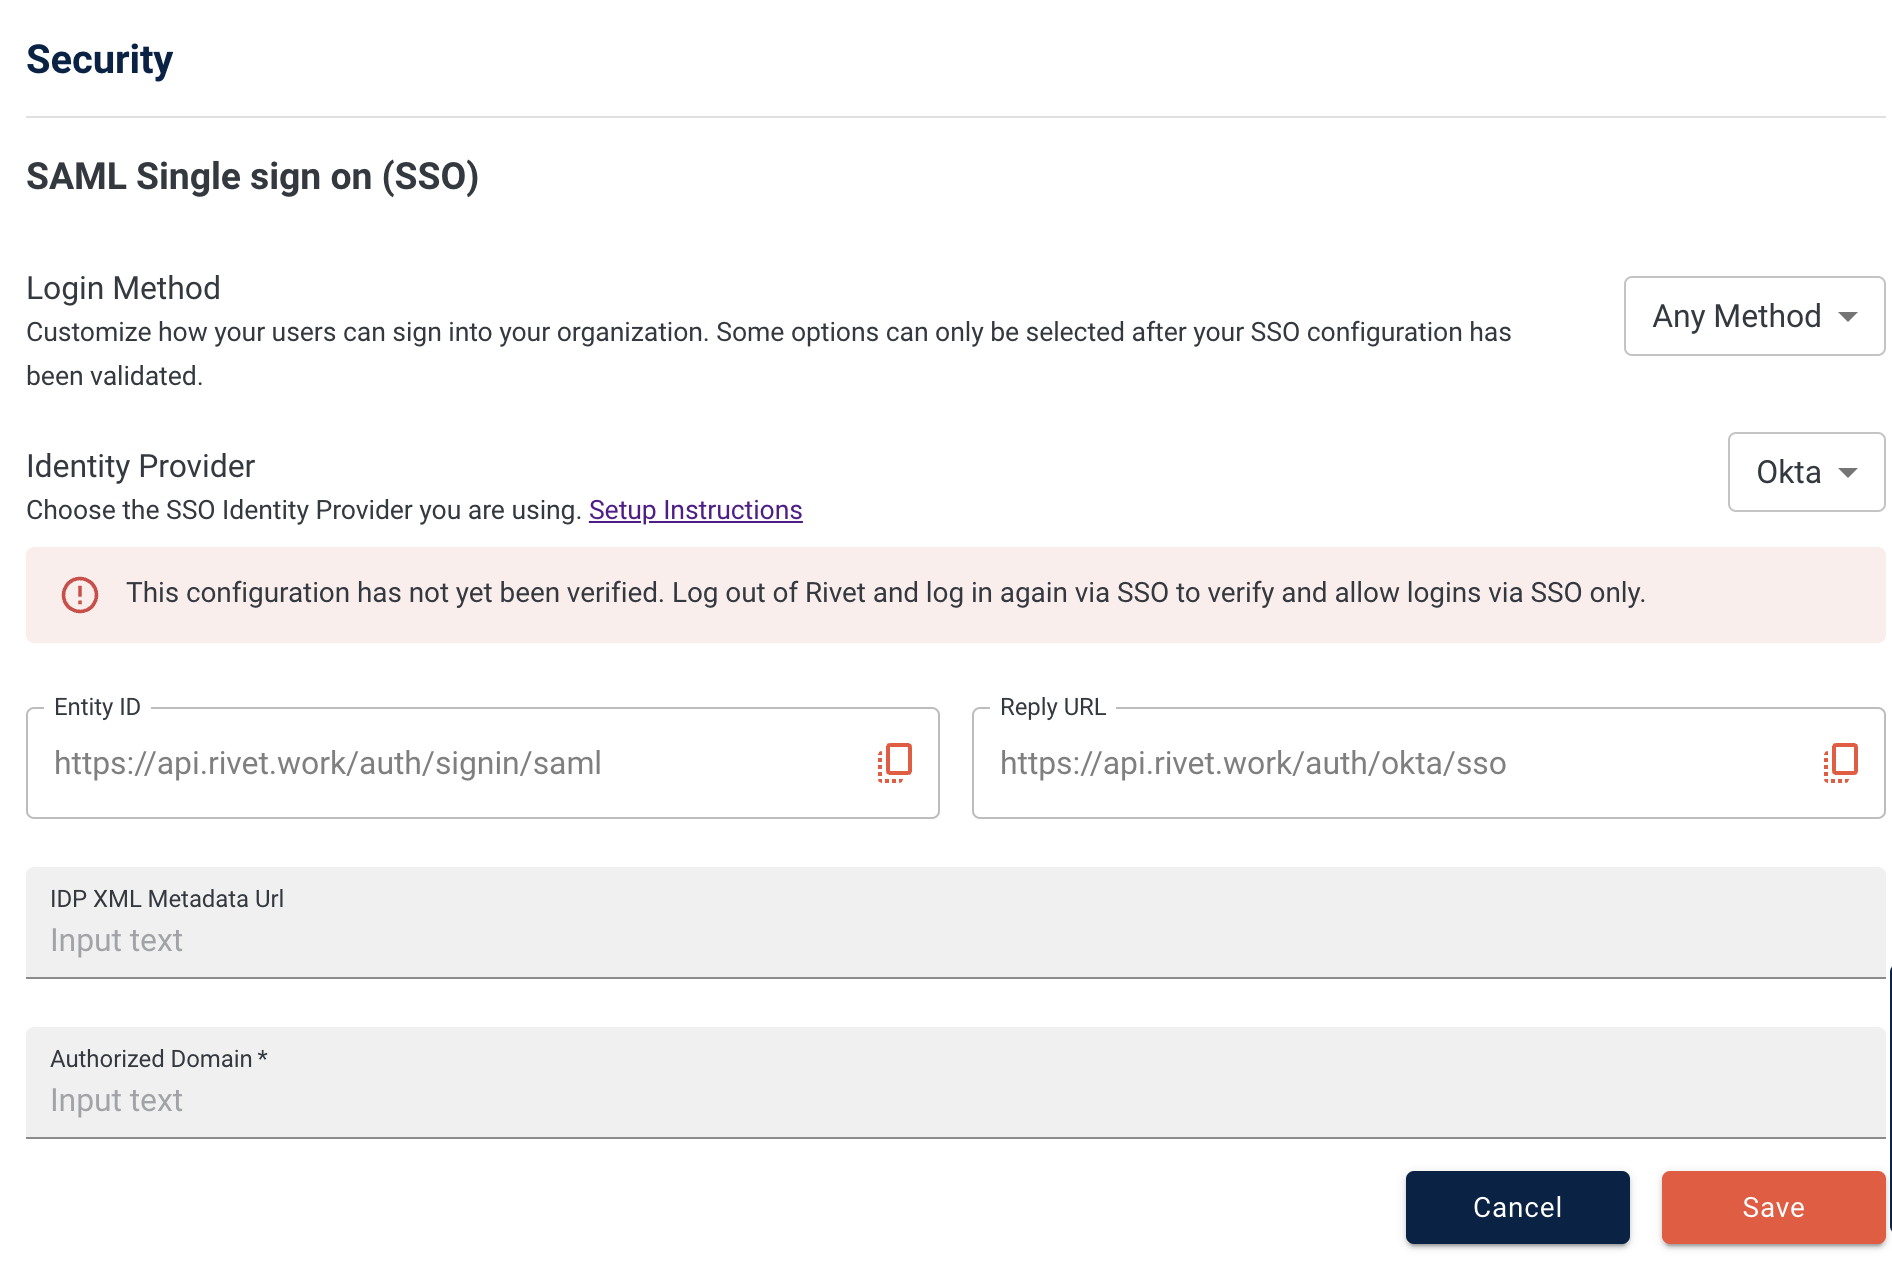
In RIVET, go to Manage Org using the settings gear in the top right, then select the Security tab
-
In the Identity Provider section click Okta from the dropdown
-png.png?width=1892&height=1266&name=Untitled%20(9)-png.png)
-
Sign in to the Okta portal. On the left navigation pane, select the Applications dropdown
-
Select Applications
-
Click New Application
-
Click Create App Integration
-png.png?width=2144&height=1018&name=Untitled%20(10)-png.png)
-
Select SAML 2.0 and click Next
-png.png?width=2144&height=1264&name=Untitled%20(11)-png.png)
-
Enter the name of your app (i.e. Rivet Work SSO)
-png.png?width=2144&height=1264&name=Untitled%20(12)-png.png)
-
Click Next
-
- Add the Single sign-on URL (copied from the Reply URL field in Rivet): **https://api.rivet.work/auth/okta/sso**
- Add Audience URI field (Copied from the Entity ID field in Rivet): https://api.rivet.work/auth/signin/saml
Under SAML Settings - Enter the following fields:
-png.png?width=2144&height=1264&name=Untitled%20(13)-png.png)
Step 2: Enter SAML SSO Settings in Rivet
- In RIVET, go to Manage Org using the settings gear in the top right, then select the Security tab
- You will need to enter and save two fields: the IDP XML Metadata Url and the Authorized Domain field.
- The IDP XML Metadata URL can be found in Okta, under the Sign-On Tab for the application you just created. There, find the field named Metadata URL.
- Copy this url, ****and paste it into the IDP XML Metadata Url field within Rivet.
- Next enter your Authorized Domain in Rivet and click Save.
-
This is the domain your employer uses for your email address assignments (i.e. if your email is jake@acmecontracting.com your domain is acmecontracting.com
-
Note: Note: this domain must be unique among all Rivet registered organizations and cannot be a common domain such as gmail, yahoo, outlook, etc…
Step 3: Assign users to RIVET
- In the Okta portal, select Applications, and then select the Rivet SSO application you just created.
- Navigate to the app's Assignments page.
- Select the Assign dropdown and and assign all applicable Users and Groups to the RIVET application.
Step 4: Verify the SSO Configuration in RIVET
-
You’ll see the banner in the RIVET security page instructing you to verify your SSO configuration.

-
Log out of RIVET
-
Log back in selecting Use Single Sign-on and utilize your email for your Rivet account under your authorized domain.
