
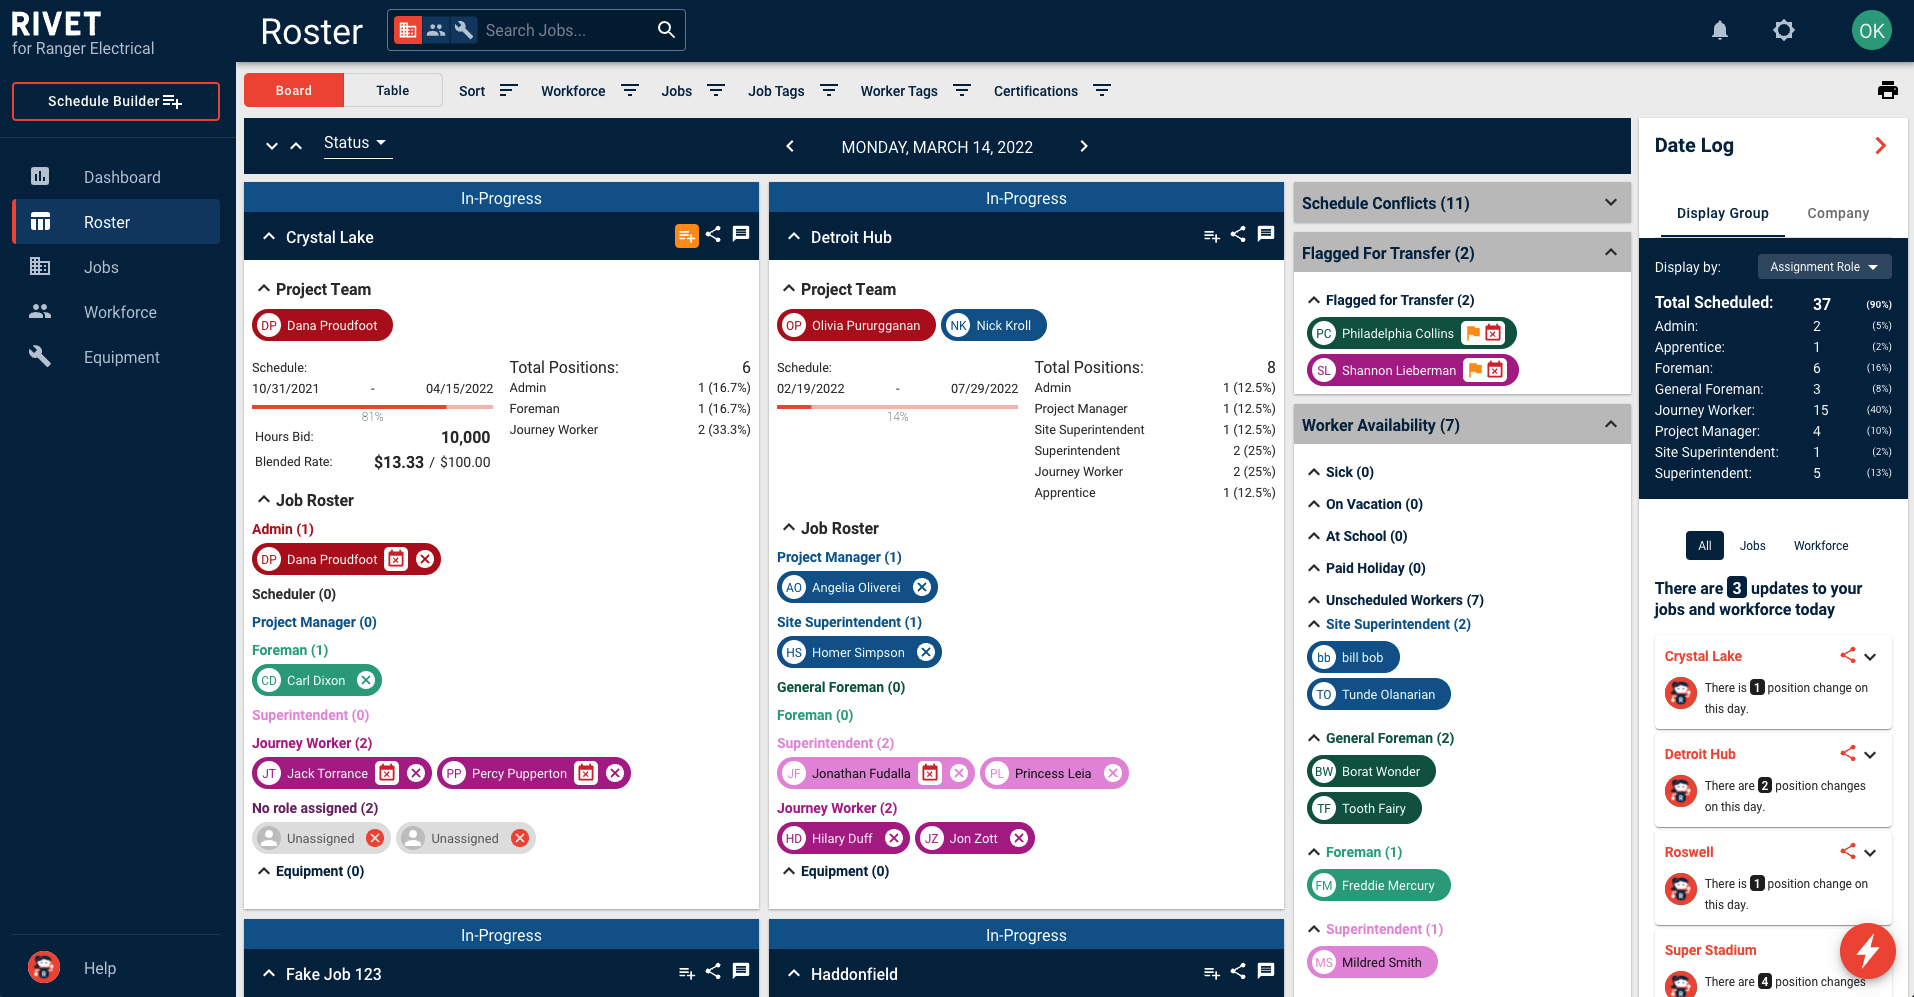
How do I build schedules from the Roster Board?
1. Navigate to the Roster page in the left-side Navigation Menu. You can either select the Schedule Builder or icon with the 3 lines and plus sign (+) to edit and build schedules. Once you select one of the two buttons, the Schedule Drawer will pop open from the right-hand side of the screen.
(If you select Schedule Builder, choose a job to schedule workers on. Select a job from the target job drop down or type it in). Select Continue.
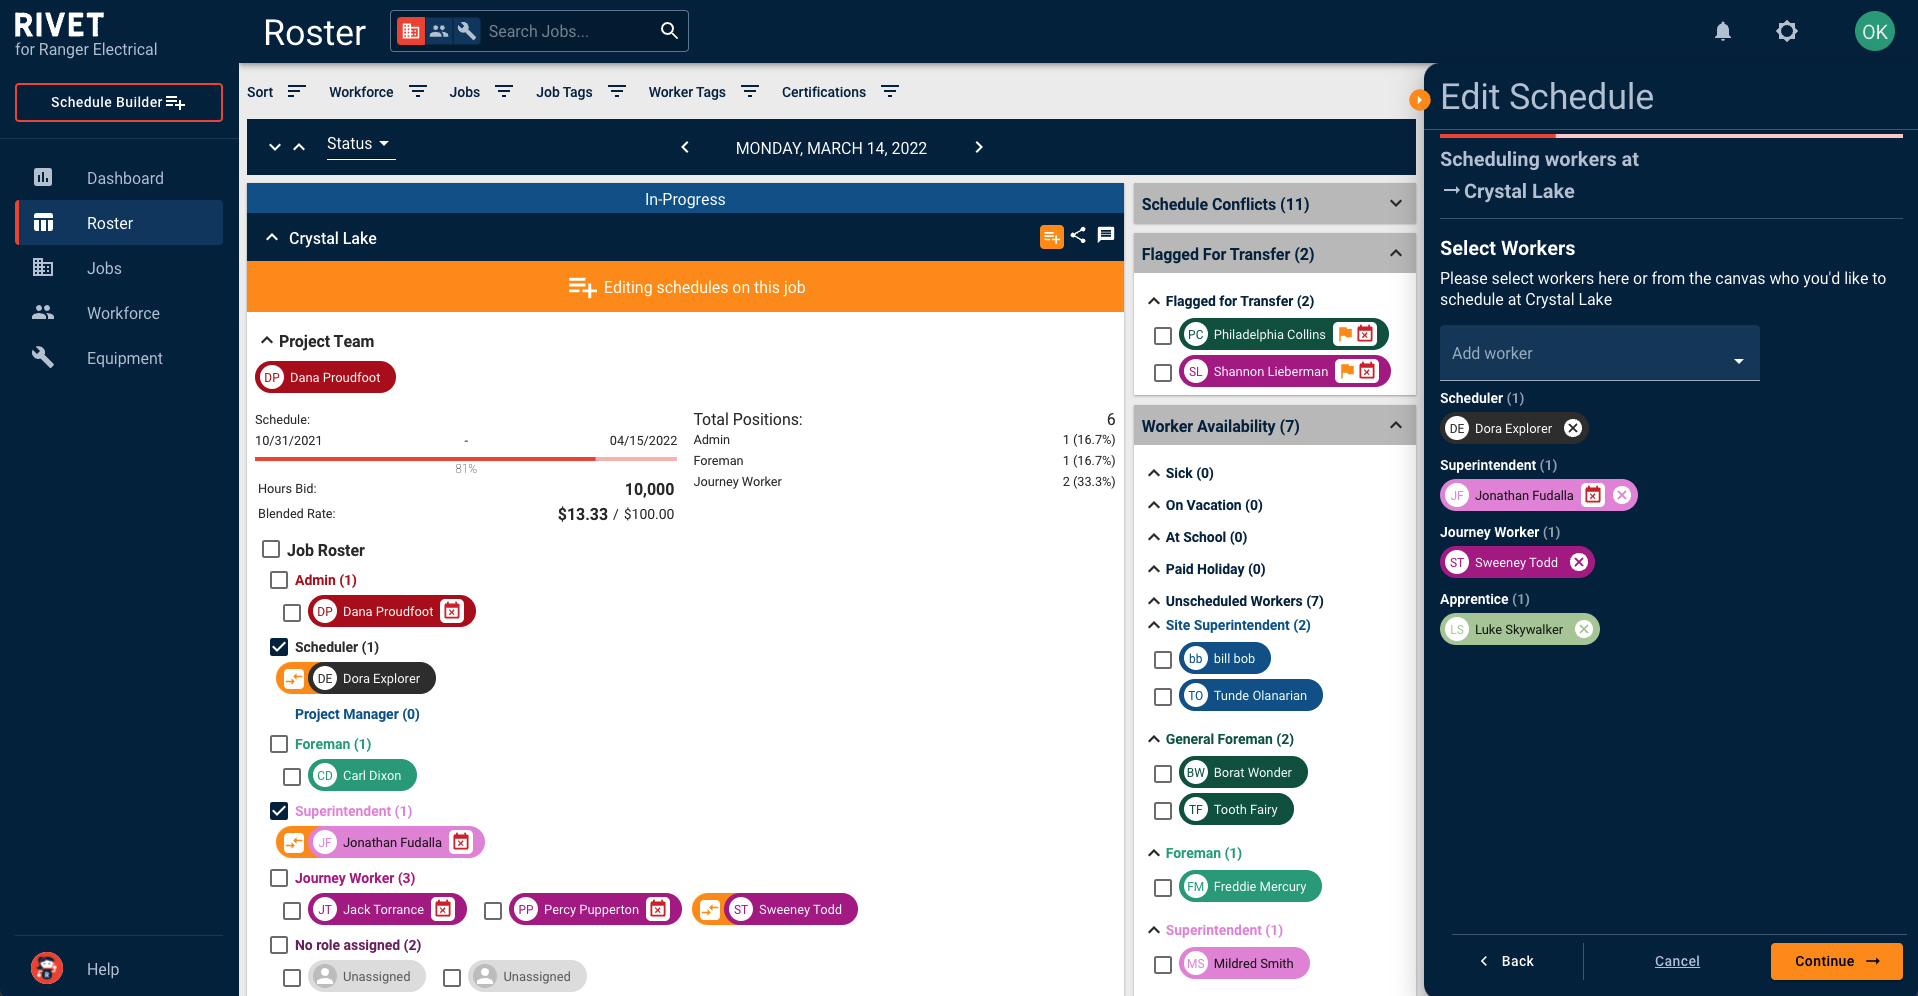
2. Select the Workers that you are scheduling. Add a worker from the drop-down menu or from the canvas that you would like to schedule. You can transfer workers to the job and or edit the schedule of workers that are currently on the job. Select Continue.
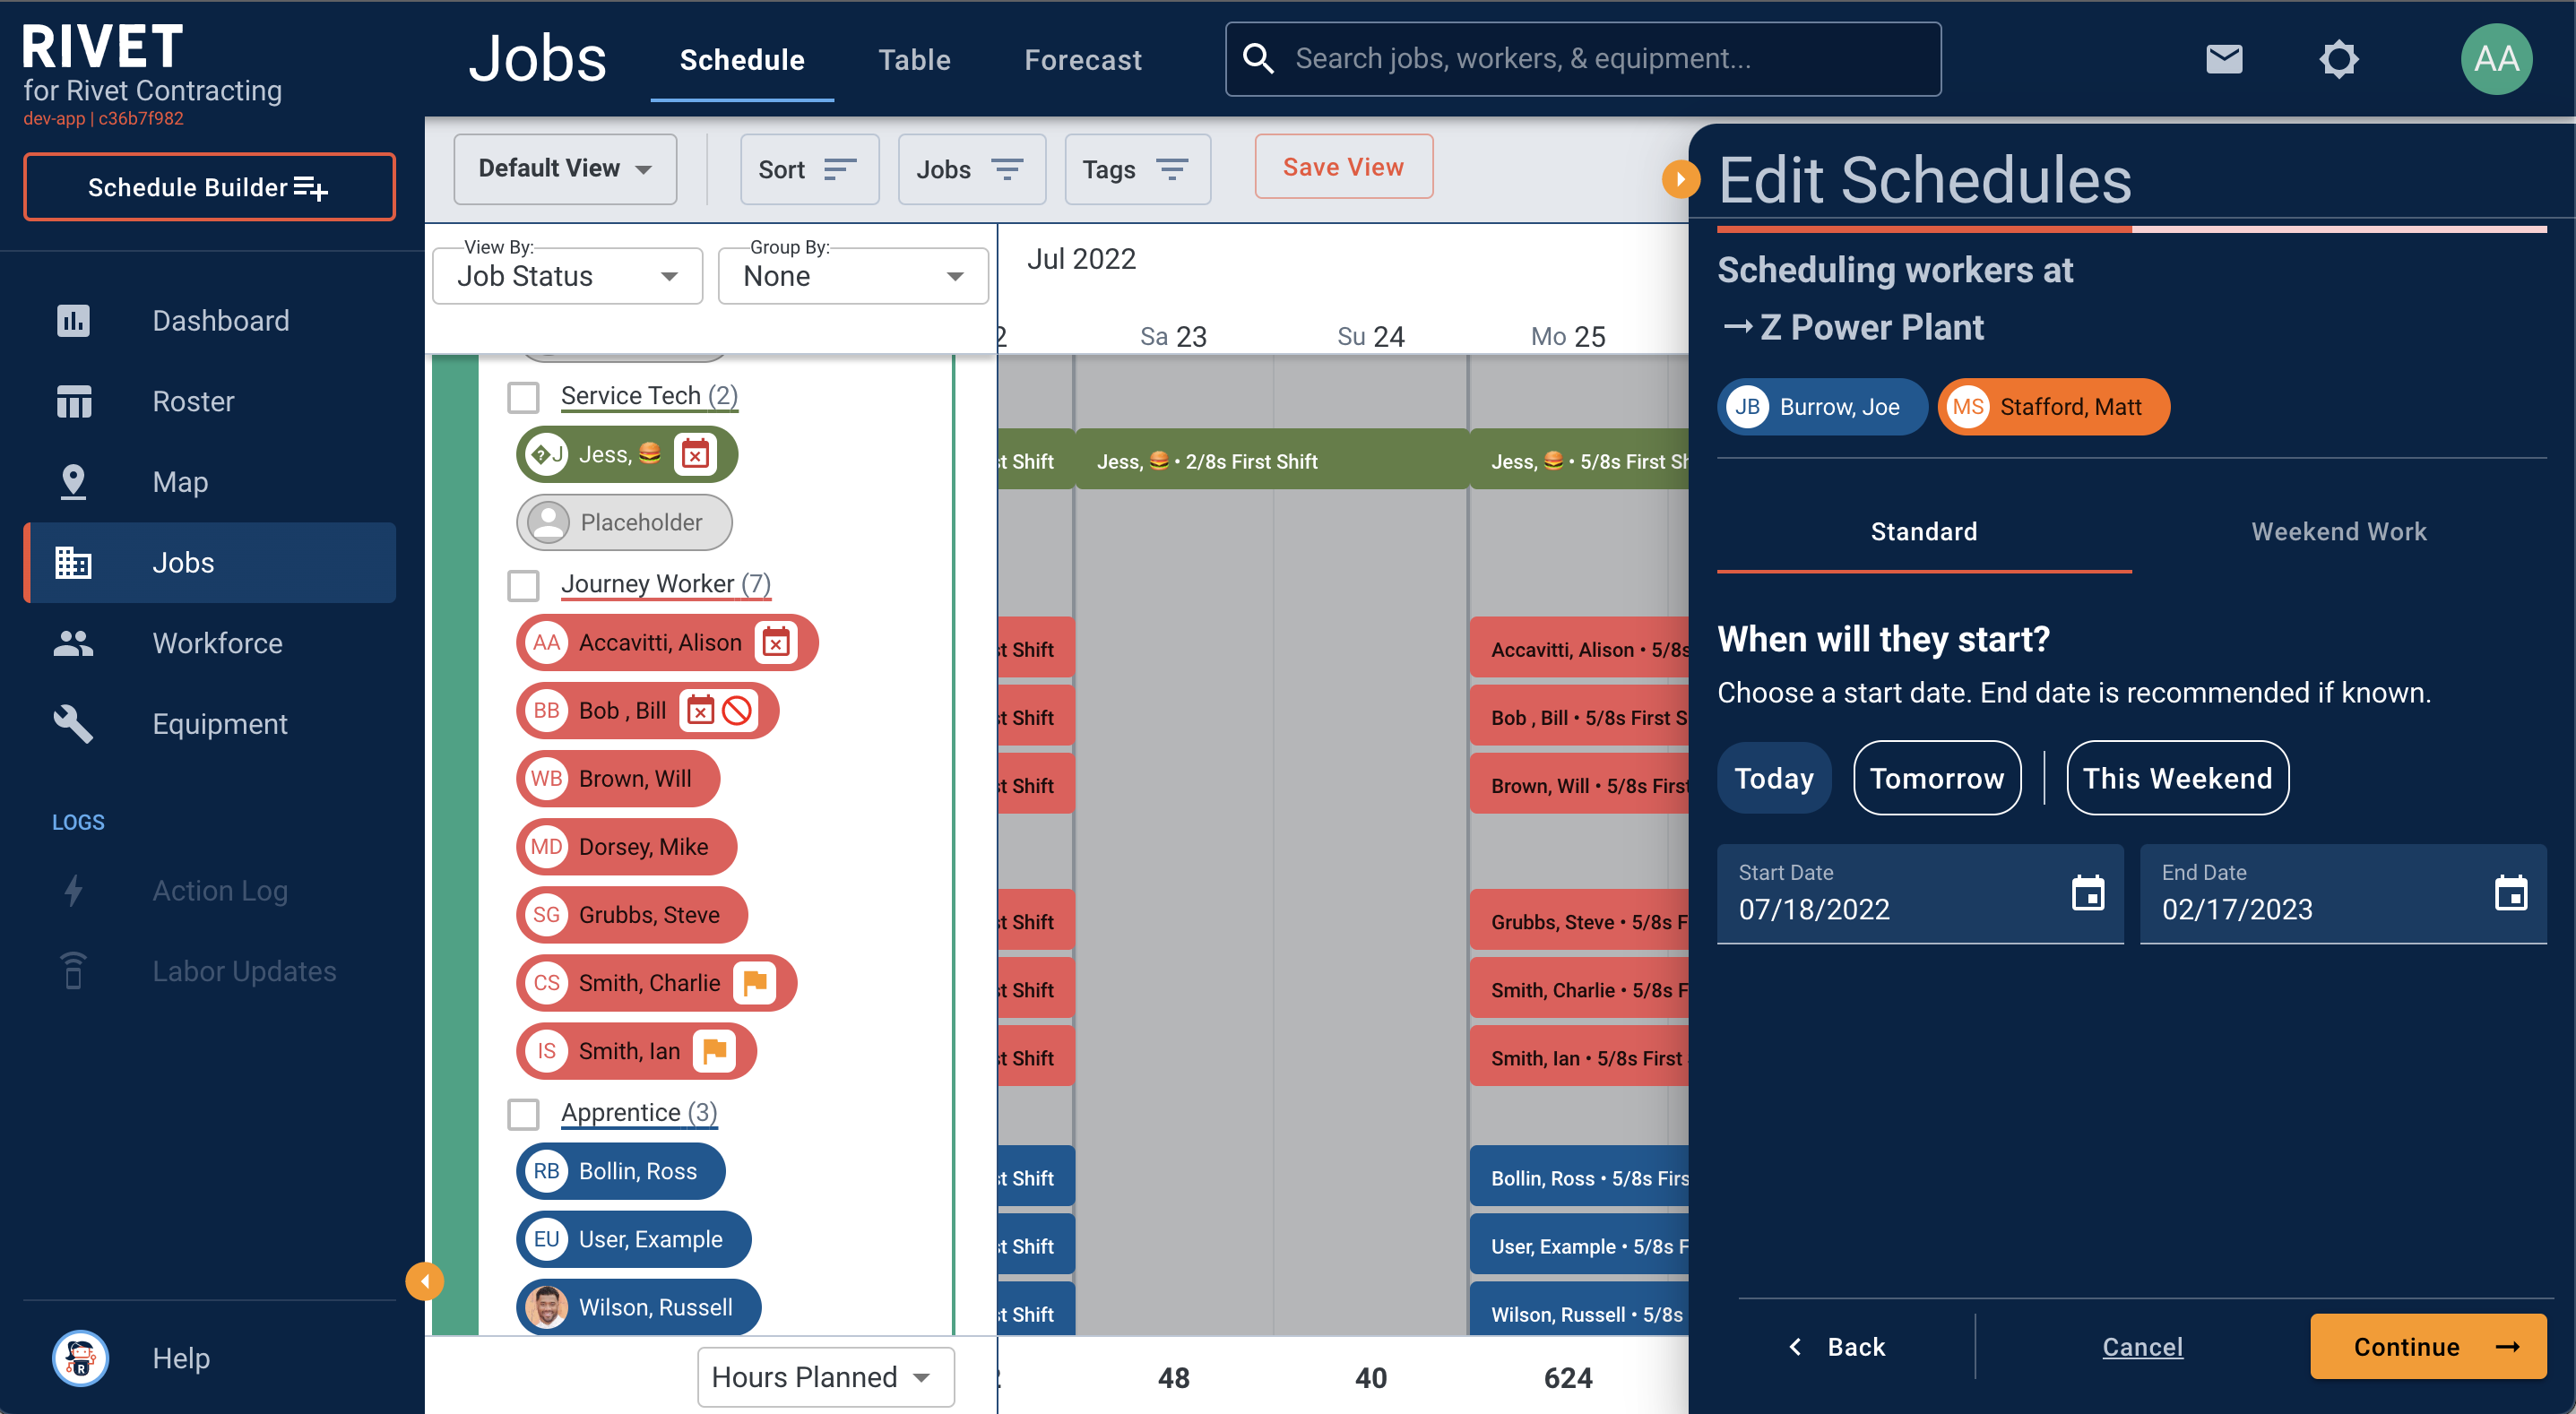
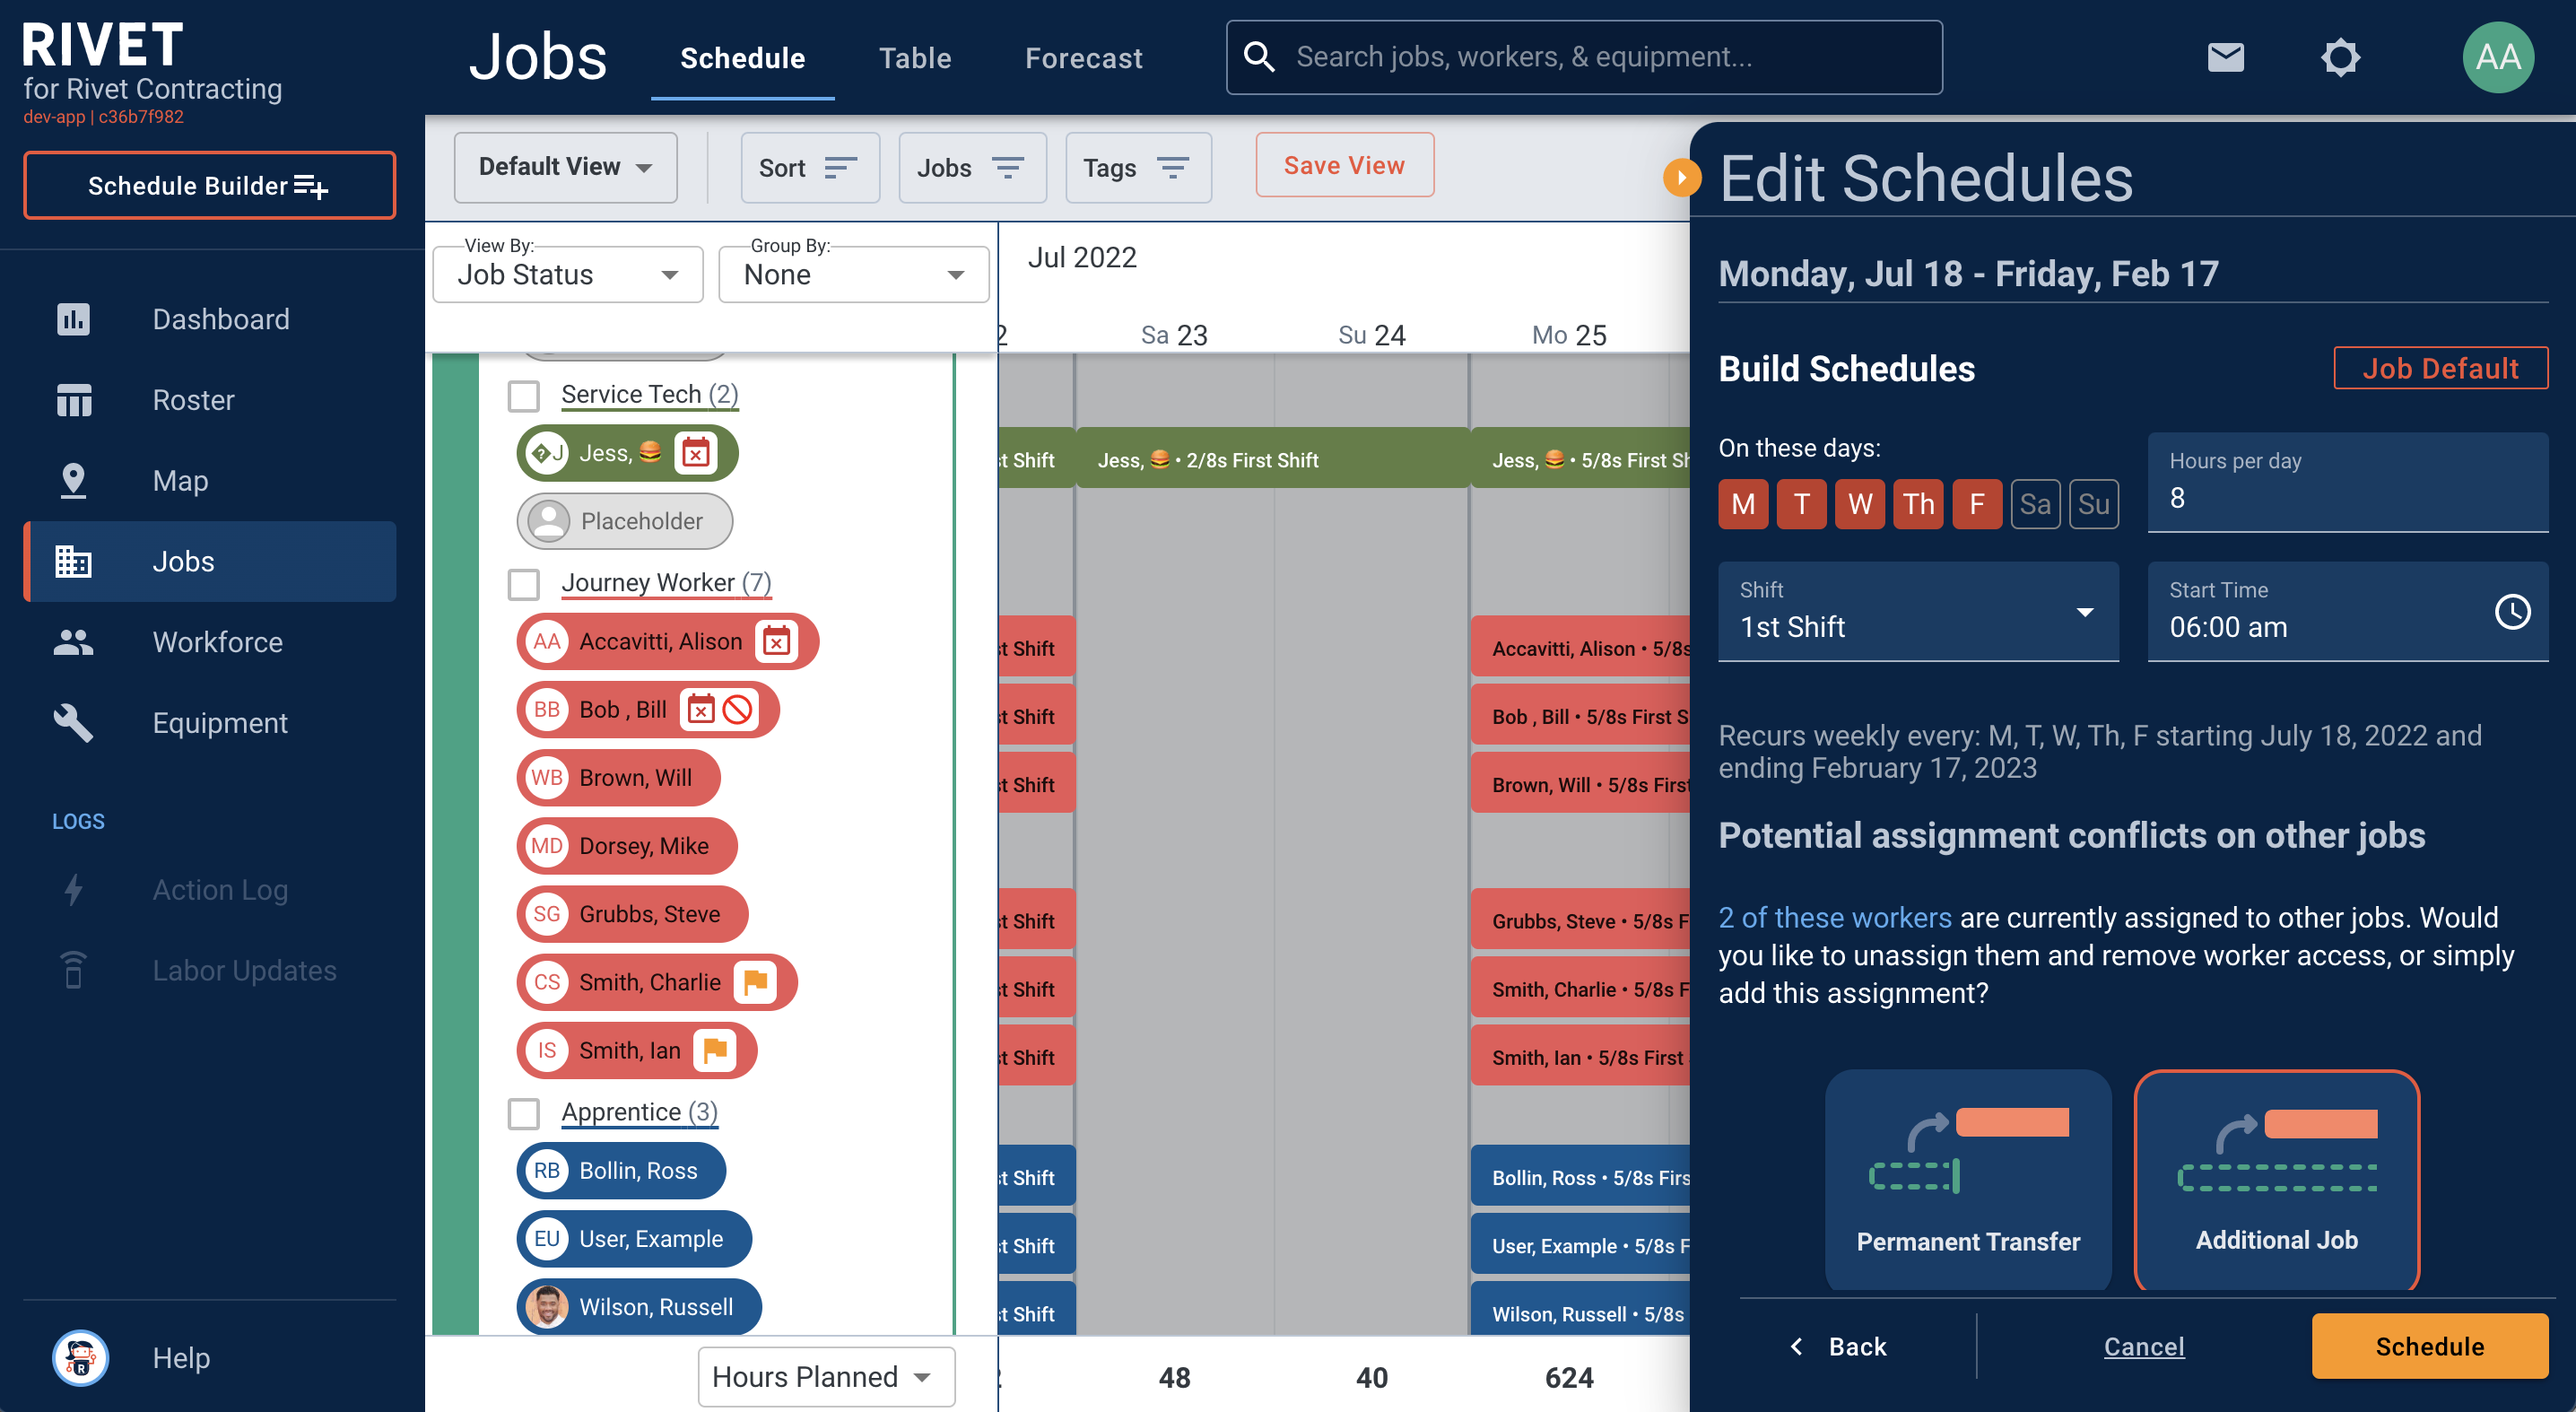
3. Build the Schedule for either Standard or Weekend Work. The default days will reflect the days you built out when you created the job, but you have the option to select different days. You can also edit the hours, shift and start time. Select Continue.
4. Please note that you will also be notified if there is a potential assignment conflict with the workers that you have selected. Would you like to make this a permanent transfer and unassign workers from their current schedule? Or would you like to add this job on top of their current schedule? Select Continue.
5. You will then be prompted to decide if you would like to clear any overlap in workers’ schedule or double book their assignments. Select Schedule.

6. Woo! You have successfully built a schedule! You can notify workers of their new assignment or the project team and field leaders of new workers that will be joining their crew via text and or email. Select Finish.
